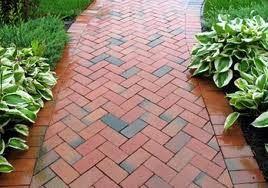
How To Pave Your Garden Path
Brick paving is one of the easily managed DIY projects around your house. They create lovely paths and patios alike. As with most things your success is in the preparation of your project. Find more DIY projects at gardening info.
Firstly you have to consider the area you are paving, and the brick that is suitable for the job, as not all bricks are the same! Paving bricks by nature are stronger than building brick, however you also need to consider the thickness of the brick if it is used for an area of vehicle traffic. There are also plenty of colours to choose from to ensure the harmony between your paved area and the rest of the house.
The other planning considerations you need to make are the size of the area you will pave. Footpaths need to be at least 3-feet wide, but if you can make it a little wider, do so. If you are planning on paving a patio make sure your garden furniture will have enough room in the end.
Once you have done all your planning, and acquired the bricks you would like you can begin your project by pegging out the area you are going to pave, and then excavate. Depending on the area yu are taking up for paving you can either do this manually or by hiring a dingo to do so – especially in grassed areas, you will appreciate it! Good foundations will mean that your paving job will last a long time, so make sure that you remove approximately 8-10 inches of dirt – dependent on the thickness of your paver, this may be a little more or a little less.
Once you dug out the area for your paving project you will need to spread the base. Most important thing about your base material is that it remains strong once compacted and provides great drainage. Generally a thick course sand – brikkies sand – will do the work. You need to spread around .75cm of the base for foot traffic, and 1cm for vehicle areas, such as driveways. To add strength to your project make sure that the base goes past the area you are paving.
If you are working with a very soft ground it is recommended that you spread about 4 cm of gravel underneath your sand for extra stability. Compact this first before putting your sand down. When compacting, the best thing to use is a vibrating plate compactor, unless it is a very small job.
In creating the levels make sure that your paving slopes away from your house, so that water drains away from your house. To help you get your levels right place two 25mm wide pieces of straight metal bars in the sand about 2 metres apart, then use a screed to spread the sand evenly between the two bars. Check levels are right, and then lay the pavers in the desired pattern.
Depending on the pattern, and also the shape of the area you are paving, you may need to cut some of the pavers to fit the area. The best thing to use is a brick saw, you can hire these for the day.
Once you finished laying the pavers, make sure there is a narrow trench around the paved area. Fill this with concrete to add support to your paved area. Allow the concrete to dry first, then sweep some dry sand into the joints of the paving before compacting the whole area with a vibrating plate compactor.
For added durability and less maintenance, you can then seal your pavers. Look for a non-toxic paver sealer.
I hope this has given you the clear idea on how to create a garden path, why not make it your next weekend DIY project?

